I may actually postpone the building of the mizzen mast and its sprit boom rig until later in the year (AFTER I launch...) but there are piece parts that I can install now while the hull is still coming together that will make yawling her later a simple matter of punching out some holes in the deck. The extra pieces are the mast step and partner for the mizzen, and an additional step and partner for the main in a more forward position (which maintains the helm balance of the boat when flying the mizzen).
Here are the two fore steps (not the same as four two-steps as they might execute in Texas):

Above are the layers of the two steps, normal to the left, yawl to the right. Per Storer, the step comprises a extra layer of 6mm ply on the bottom, followed by two 19mm layers that will be cut out to receive the mast base. (I've used some quality plywood from a previous project because it was the right size. I am depending on the epoxy encapsulation to keep it from de-laminating). For the fore step, I needed to raise the height bit so I could direct the drainage properly. I did so by using a 19mm base layer as well.
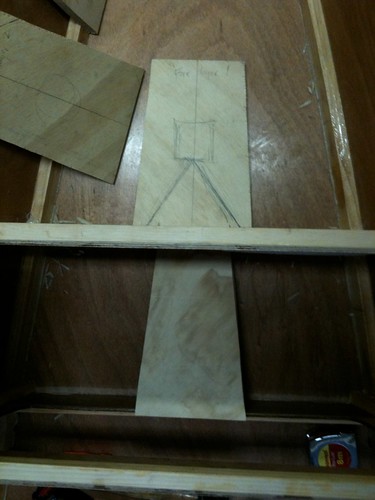
The diagonal lines above show the planned drainage path (although I only used one afterall). The channel will meet up with a holle through the bulkhead's framing and will spill into the space behind the bulhead, alongside the normal mast step. This should retain the airtight bouancy chamber forward of the bulkhead while keeping the step free of water. That concept depends on a airtight tube running from the step to the deck which will be featured in a future post (it's built, I swear).

Here is the main step in position. The careful observer will note the limber hole in the corner of the well. The screws are simply holding the sandwich together before gluing.
There is more progress on steps and partners, but my photos are not all uploaded to Flickr yet. Stay tuned for Steps Parts 2, 3, and beyond.
No comments:
Post a Comment