

That's it. "Make Stem." Ready, GO!
So, to any future Goat builder that wonders how to follow that directive I offer my interpretation of how.
I began by laminating some of my framing stock (off cuts actually) to create a blank that is larger than the finished piece will be. I did this a while ago when I was mixing glue for some other part and I didn't want to try to make a tiny batch or let a decent batch go to waste.

The "diagram in Fig 7" does provide the dimensions for the triangle shapes of the top and bottom of the stem. The challenge is that the top triangle is larger, so over the length of the stem, some tapering must occur. I began by transferring those shapes to the blank (once I cut the ends flush). I made sure to put the thinnest of the laminations to the rear of the stem where it will have more glued surface.


Once I was convinced that the blank's rough shape would yield the final piece (I've learned the hard way that things don't always work out as planned...) I trimmed the four sides to match the larger triangle.


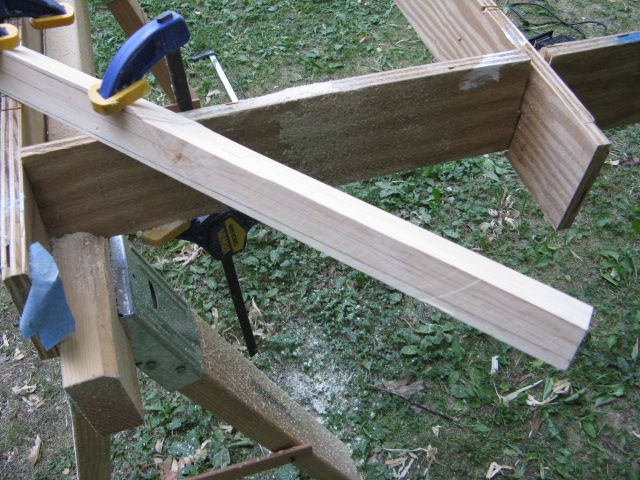
Then next step is to remove all that excess. Since I had my table saw fired up from making foils earlier, I decided to angle the blade and run the stem through to get the rough shape. The angle matches the larger triangle.


The last bit is the tricky part (not very). I think others have used planes to finish the process. But the stem is so short, I couldn't use my 14" plane to shave away the remainder. Later in the day I finally broke down and bought small and very small planes and I can see where one might be able to do it that way. Instead, I began by using a technique I've read where you carefully cut from the front to the back and then sand (or plane) until the cut just barely disappears.


From there is was belt sander time. Lots of sawdust was created. Definitely an outside job. I abandoned the cut technique after the first side. I was pretty comfortably with how the shape was progressing, even without the cuts.


Voila! Stem "made!"
Which means I'll have something to attach my two hull sides to when the time comes to "go 3D." Cool.
No comments:
Post a Comment