Welcome statement


Welcome to my blog on the building and sailing of a Goat Island Skiff (GIS). Join us on the Michael Storer Wooden Boat Plans forum or on Facebook, where the community of Storer Boat builders, owners, and admirers share their ideas, experiences, and watery hi-jinx.

If you are new to this blog, start at the beginning by selecting the oldest date in the blog archive located in the left-hand column. Enjoy!

Sunday, July 31, 2011

Bringing up the rear

I fitted the transom top frame today.  I was supposed to fit this piece along with the other frame members.  However, I delayed because I had an opportunity to score some very special wood and I thought I would use it here.  However, coordination for the wood fell through (although it sits in Kentucky waiting for me...) so I finally bought replacement lumber.  I'll be using matching lumber for the knees and breasthook.  I think it will look good.

[Edit: as it turns out, I was able to transport the special wood--Black Walnut from my in-laws' farm--in late August.  Althought the transom piece is set, I will be using the walnut for breast hook and knees afterall.  I should have a more details in an August posting.]

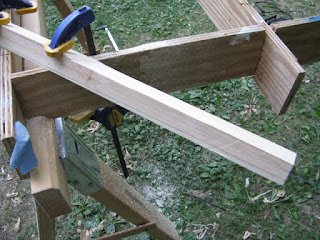
It took a little time to work out the shape I wanted now that I've deviated from Storer's simple plan.  Normally this piece would would be a straight horizontal board along its bottom edge, but my enlarged tiller cutout called for a deviation.  The large bar clamp is keeping the frame from wandering away from the side frames.  Now that this piece is in place I can coat the rest of the transom as I have done with the other flat assemblies.


Also, it's important to note something the plans don't mention.  NOW is the time to add reinforcement to the transom for the rudder hardware to attach to.  In fact, I plan to install that hardware while the transom is still apart, another deviation from the plan.  Once the hull is built, the lower rudder attachment will end up inside the buoyancy tank which might be very difficult or impossible to reach depending on how one installs inspection ports.  By doing it now I can manhandle the transom with ease.  Great thanks to Paulie of Connecticut for the tip (sadly, one he was unaware of for his own build).

I'm pretty close to being able to go 3D with the hull.  The stem is complete.  The transom is complete.  All the bulkheads are complete.  All I need to do is make my chine logs and gunwales and coat what remains to be coated.  Good thing because the calendar keeps rolling by...

Saturday, July 30, 2011

"Make Stem"

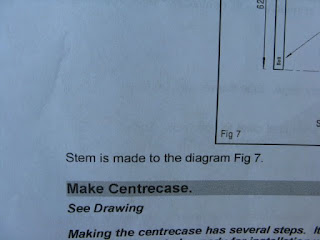
At this point in the story, I need to explain that Michael Storer is not only a brilliant boat designer, he's genuinely a nice guy that wants his builders to have an easy time of putting his boats together.  His plans are not just technical drawings of offsets and scantlings; he takes the builder through the process and offers advice and tips along the way.  For the most part.  But occasionally, Mr. Storer is a little... um... brief... with the instructions.  Case in point:


That's it. "Make Stem."  Ready, GO!

So, to any future Goat builder that wonders how to follow that directive I offer my interpretation of how.

I began by laminating some of my framing stock (off cuts actually) to create a blank that is larger than the finished piece will be.  I did this a while ago when I was mixing glue for some other part and I didn't want to try to make a tiny batch or let a decent batch go to waste.


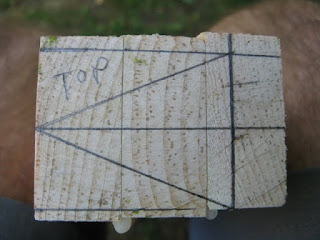
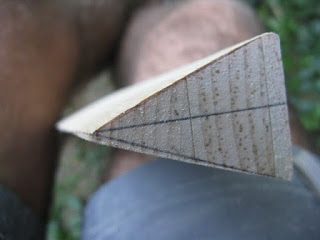
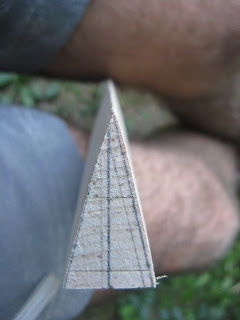
The "diagram in Fig 7" does provide the dimensions for the triangle shapes of the top and bottom of the stem.  The challenge is that the top triangle is larger, so over the length of the stem, some tapering must occur.  I began by transferring those shapes to the blank (once I cut the ends flush).  I made sure to put the thinnest of the laminations to the rear of the stem where it will have more glued surface.

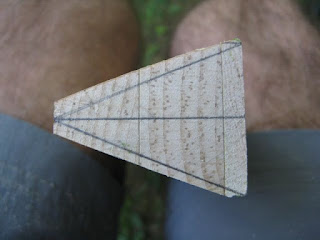
Once I was convinced that the blank's rough shape would yield the final piece (I've learned the hard way that things don't always work out as planned...) I trimmed the four sides to match the larger triangle.


Then next step is to remove all that excess.  Since I had my table saw fired up from making foils earlier, I decided to angle the blade and run the stem through to get the rough shape.  The angle matches the larger triangle.


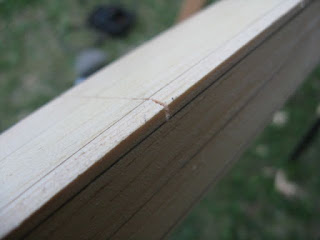
The last bit is the tricky part (not very).  I think others have used planes to finish the process.  But the stem is so short, I couldn't use my 14" plane to shave away the remainder.  Later in the day I finally broke down and bought small and very small planes and I can see where one might be able to do it that way.  Instead, I began by using a technique I've read where you carefully cut from the front to the back and then sand (or plane) until the cut just barely disappears.


From there is was belt sander time.  Lots of sawdust was created.  Definitely an outside job.  I abandoned the cut technique after the first side.  I was pretty comfortably with how the shape was progressing, even without the cuts.

Voila!  Stem "made!"

Which means I'll have something to attach my two hull sides to when the time comes to "go 3D."  Cool.

Makin' Blades

So today was an absolutely beautiful day in Northern New Jersey and I spent virtually all day outdoors.  First on the agenda: Daggerboard and rudder a.k.a. foils a.k.a. blades.  I use the term dagger board rather than center board because I'm of the notion that one which slides vertically is a dagger and one which swings on a pivot is a center board.  But I recognize either reference.

I begin this tale by describing the materials.  The plan calls for Western Red Cedar or suitable substitute.  Home Depot currently has a stack of "Premium White Wood" studs in both 2x4 and 2x3 dimensions.  It's pretty straight grained and light weight and although it's fairly knotty, the knots are mostly very small and tight.  I feel that the nature of the construction and the usage will tolerate these knots.

"White wood" that is some sort of spruce/pine/fir.  I guess pine.

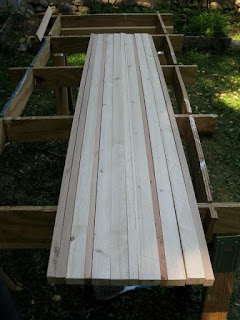
I bought 2x3s originally planning to rip them into 1x3s.  I changed my mind and ripped them the other way, creating 1x2s which actually left less waste and spanned a greater area when arrayed as an assembly.  The darker end pieces are red oak which matches what I used in the centercase's mating surfaces.

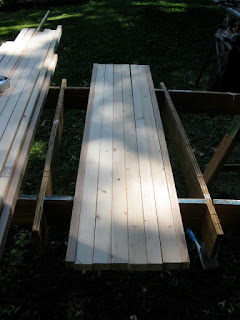
Rudder staves lined up.


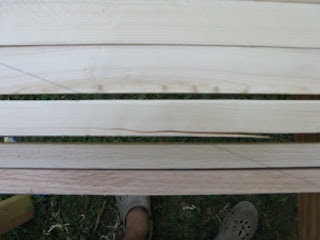
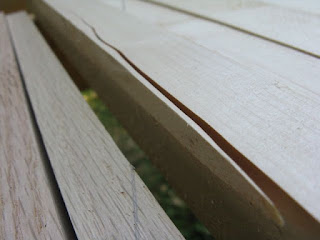
Once I laid out the dagger board staves, I traced the outline of the final shape to try to relocate some of the worse defects into the areas to be cut off.  That's when I noticed one of the staves had a split in a place that couldn't be avoided by repositioning.


So I went back to the wood pile and pulled some other off cuts, including a couple of strips of douglas fir which I think might add a touch of strength as well.


I then brought all the staves into the garage for a dry run of the gluing setup.  After I post tonight's blog entries, I'll mix the epoxy and create the blanks overnight.

[UPDATE:  I didn't get to the epoxy until the next day.]


One big reason for tackling these parts right now is because I want to make sure my center case is sized correctly for the board.  I don't want to have to crack it open later if it turns out the board is too thick or thin.

Next up: something actually on the critical path, the stem.

Sunday, July 24, 2011

A little bit of this, a little bit of that...

No pics tonight but I got some good progress done this weekend.  I finished beveling the various bulkheads and got three wet-on-wet coats on one face of all of them and the centercase and rudder cheek interior faces.  I did all of the faces that are hidden from view to get some practice/experience with rollers and brushes.

I spent quite a bit of time contemplating the tiller/rudder box. I ordered pintles and gudgeons rather than the single rod set-up the designer prefers.  That requires a larger transom slot than the plan calls for to accommodate lifting the pintles out of their gudgeons.  I spent some time deciding how to go about that.

While messing with the tiller/rudder box, I found that the spacer portion of the box (what in my mind I'm calling a stem piece) set into its epoxy slightly askew such that the two cheeks will not be parallel when the two halves come together.  It's slight enough that gluing the two halves together can correct the angle.  But I'm going to ensure that through careful sizing of the tiller's aft most spacer block.  I'm also seriously considering reinforcing the box with plywood along the tops of the existing frame members.  I'm already skeptical about the utility of the aft bolts that are flush mounted from the inside.  They're in there now, but I wouldn't be opposed to cutting them off if I provide a different strengthening solution.

I also laminated some pine together for the stem.

Finally, I paid some more attention to my oars.  Lots of sawdust, but still only a rough shape...

Wednesday, July 20, 2011

It's the little things...

...that add up to hours.  So now that my bulkheads are mostly done, they need cleaning up (epoxy ooze and drips) and several of them need their edges bevelled to very specific angles per the plan.  Each frame is located with the future bevel in mind and some of my frames wandered a little during gluing.  I'm pretty sure it will all come together fine.


Today I also took the time to chop up the numerous inwale spacers that will fit between the inwale and the hull sides.  Simon in Florida detailed his technique in his blog using a plunge router to achieve a curved edge:


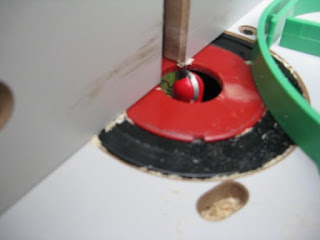
I don't have that sort of set-up.  But I do have a router in a bench (now...) and came up with another way to skin this goat.  Using a 3/8" radius round bit, I ran the board through edgewise on both edges.


Then I chopped the board into slices that will match the width of the inwales.  It's hard to say exactly how many are required because everyone has approached this detail differently.  Basically, each side is close to 17' long and the spacer-to-gap ratio is about 1:1.  But exactly where each spacer is placed to coordinate with bulkhead side arms and the knees fore and aft has been interpreted differently by each builder.  So here's a stack that I'll start with.  If needed, I can make more.

Sunday, July 17, 2011

Glue-o-rama

Much lumber was turned to sawdust as I cut the frame members from the EWP boards I scored.  Each bulkhead has four sides to frame, but each is different as to how their frames fit: front face, back face, both, etc.  Saturday ended with multiple gluing parts settling in for the night.

Video parlor-turned-glue-factory

Your humble author also settled in with a summery libation called a Ferrari (one part Amaretto, two parts dry vermouth):

Ferrari: very refreshing!


The following day found no mis-steps or disasters and so we pressed on.

The plan calls for the bottom's buttstraps to be sized based on the finished dimensions of the centercase, but the center case can take different dimensions based on the builder's choices.  So I made my choices, including the addition of outdoor carpeting as a liner based on recent forum discussions.  Those discussions also led my to substitute hardwood in two places where the centercase sees abuse from the centerboard.  Finally, there were bulkheads that needed to be flipped and frames applied to their opposite sides, and the tiller/rudder box assembly.  Oh yeah, I really wanted to get the hull bottom assembled while I still had the basement free  from video game zombies...

Centercase with oak inserts

Back yard-turned-glue-factory

Two halves of a rudderbox

The factory keeps churning...

The libation for this day was an old standard, a classic go-to beverage: Agua Pura con Hielo

Ice water cures ALL

Let the butchery begin!

WHat good is overly expensive plywood if you don't chop it to pieces?

So, while my family is away on vacation and I have the basement to myself, I commenced to lofting, cutting and gluing as much as I could.  My Dad stopped in to "supervise" and was kind enough to play delivery truck driver for me as I picked up a load of Eastern White Pine for my framing pieces.  The folks at Boards and Beams have a nice stack of decent EWP boards at a very reasonable price.  They were very helpful and will get my repeat business if needed (gun'ls...).

It all starts with lofting the lines onto the panels:

Lofting begins with a side panel

looking forward to the bow

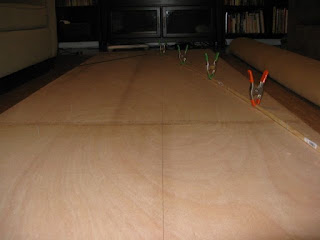
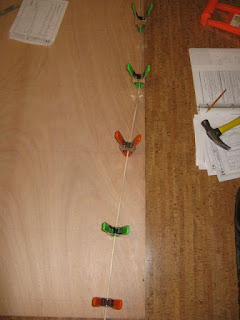
And then you come to the cursing part.  At some point, my methodical process broke down and I missed a measurement.  That mistake took place very early in the marking so I made the vast majority of the marks incorrectly.  Those marks received little nail holes and the nail holes were connected by a very long pencil mark before I found the mistake.  At the aft end I  found my batten forming an odd shape, certainly not fair:

S-curves are not in the plan!

Once I re-checked the measurements, I realized what I had done.  And I cursed.  Then I turned off the lights and watch a movie.

I would go on to correct the matter, but it was a little unnerving to have made such a silly mistake since I thought I was being so careful, checking off the measurements on the plan sheet as I went along.  ANyway...

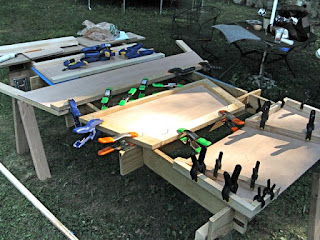
I spent the following day outdoors, building a cutting table, buying lumber (thanks again Dad) and cutting parts that I correctly marked.  Since my dad was so busy supervising, there are few photos.

Captain-to-be

Thursday, July 7, 2011

Getting good wood

I'm alone in my house for a week or so while my wife and kids are visiting with family, so now's a great opportunity to hijack the basement with big sheets of plywood.  After briefly considering ordering less expensive ply of questionable pedigree, I took the plunge and ordered six sheets of Joubert brand 6mm, 5-ply, Okoume marine plywood from Robert's Plywood on Long Island.  The clincher was that they'd deliver to my door the next day (because they happened to be making a delivery nearby anyway). $90 a sheet, delivered.  All my internet compadres said, "good deal on great wood" and "you can't go wrong with Joubert, and that's a good price for it."

The good stuff

Mmmmm....

...tasty

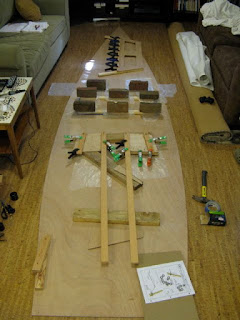
Can I lay out two sheet end-to-end as required for the side panels and the bottom?  Just barely:

Typical bachelor behavior

I can't loft the big pieces yet because I don't have a fairing batten long enough yet.  But I did lay out the patterns on one sheet last night: the transom, front seat and two bulkheads.  At this point I must state for the record that while I think Michael Storer is a brilliant designer and overall nice guy, his method for marking out the parts is BONKERS.  There.  I got it off my chest.  I'm smart enough to understand how to get where he wants me to go, but I'm pretty sure I wouldn't have done it this way myself.  My goal is to loft a sheet per night for four nights (including the two double sheets) and then cut them all out.  But I do need a batten...

Oh yeah, and I need more lumber so I can frame the parts up.  If all goes well, I can go 3-D when the family returns.  I really do want the kids to have a hand in this build, I swear...


Fun with 'glass

Prior to making the pilgrimage to Mystic, I took my first crack at fiberglass.  Once again, I'm using my spars as a testbed to figure out how to do something that I'll need to do again later on the hull.

I purchased fiberglass cloth as well as tape as required for the build overall.  The plans describe using 2" tape to wrap the ends of the spars to prevent splitting.  I'm more comfortable with 'glassing a larger portion of the end so that all holes and fittings are supported by the 'glass.  The plans also mention 'glassing the boom and the mast where they meet to reduce chafing damage.  I plan to leather those areas as well, but having the extra protection seems wise.

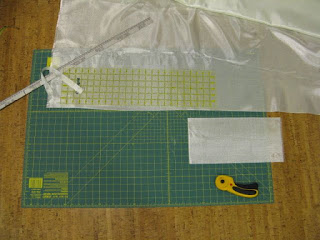
Quilting tools make short work of measuring and cutting
Clew end of the boom
Forward end of boom to protect the tack mounting and mast contact areas

I learned that it's hard to estimate how much epoxy is required for the task at hand.   I had two spars on hand, about three feet of length on four sides each.  In the end, I had to grab my mast as well and cover it too or risk wasting a fair amount of epoxy.  However, I wasn't prepared for that task so I was cutting 'glass and arranging the work while the epoxy was already mixed.  The last bit of coating was like smearing Jell-O.  It all came out OK, but I was a little panicky that things would be horribly screwed up.  So I also learned not to stress over things as they go awry because there's a good chance that it's not as bad as it seems at the moment.

What I was trying to do

What I was trying to avoid doing
And I learned that a good sharp razor can help recover from some ugly results.

Ugly results


Recovering from ugly results
Once cured I sanded these ends down.  I don't have pics to post yet, but I can still take some and add to this post later...

I have some hardware ready for these ends which was another reason for tackling this step so soon.  I'll post up my plan for bending on the sails and the hardware I've chosen.